In 2006 I posted a long step-by-step account of my Kyra and Lavarath build on the Reaper Miniature forums. The mini was Reaper’s 3000’th production miniature, and I wanted to do something special, since it was a very nice piece. I used a lot of new techniques, extensively used my airbrush (which I wasn’t too familiar with at the time), and more than anything else took my time with it. As a reward for my contribution to the Reaper Show Off forums, I was given the opportunity to have the whole account posted in Reaper’s Craft and Tutorial section of their site.
Assembly
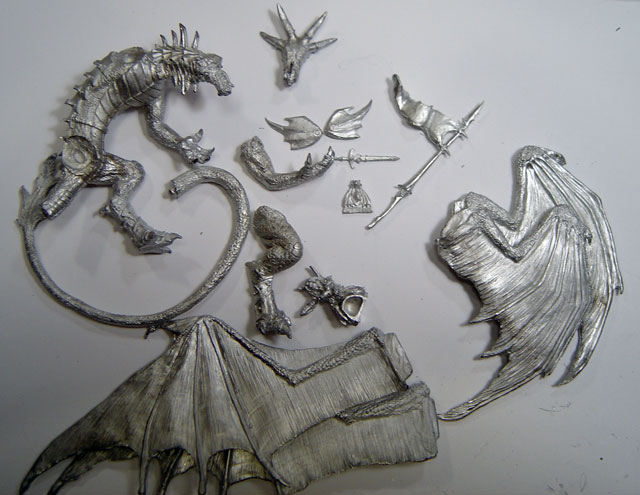
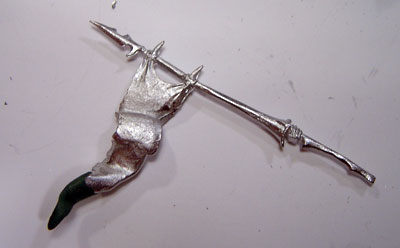
All the pieces, laid out, washed, filed and cleaned. As you’ll notice, I’ll be using the Ebonwraith wings on Lavarath instead of the wings that came in the blister… Maybe I’ll use those on Ebonwraith.
Assembly
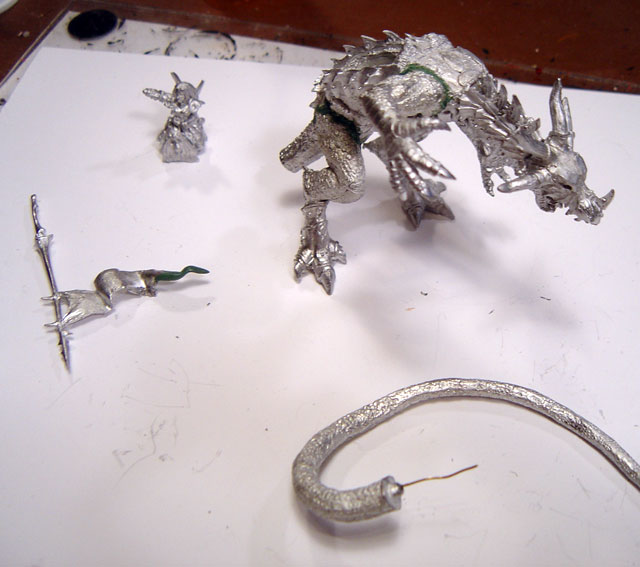
Waiting for the arm, leg, and head joints to set and dry before I pin the tail on.

Assembly
My next step was to come up with some way to attach Lavarath to the base… I went with some long pieces of brass rod inserted about 1cm into the feet, and long enough to fit all the way through the foam. I just drilled a few holes in the feet, and superglued them in.
Assembly
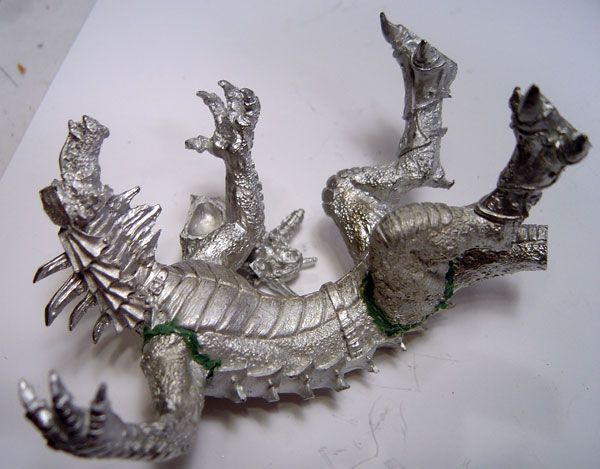
Leg and arm went on really nice. Easy to pin, and I probably don’t even need the greenstuff.
Banner
My quick-fix on the banner. I just hope that the green-stuff’ll hold, or I’ll need to come up with another solution (probably more greenstuff, but with some copper wire in there for stability).

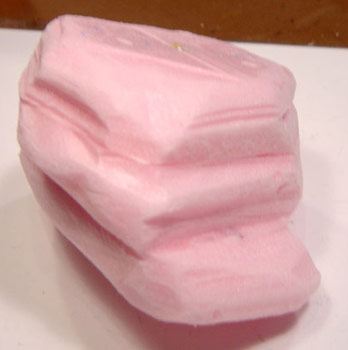
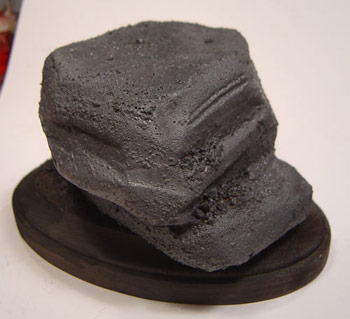
Base
Below are my basing choices so far. Gonna put em’ on a big rock, I think.
Base
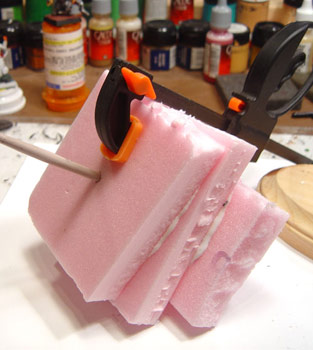
Last night, before I went to bed, I stuck the styrofoam together with some white (PVA) glue. I also shoved an old broken paint brush shaft through it to give it some stability (and to give me something to fasten it to the base with!)
Base
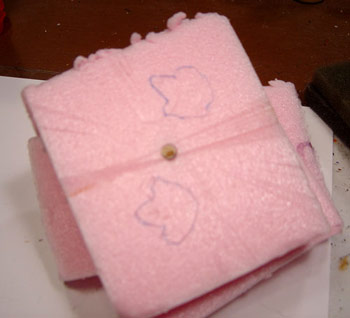
When I got started today, I placed Lavarath on top, and outlined his feet (so I’d know what to leave behind). I also trimmed down the stick a bit… I left bout a centimeter in the bottom, and trimmed it nice and close up top.
Base
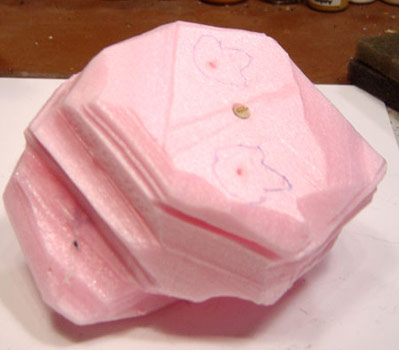
Then it was just a matter of rough-cutting out some rocky shapes. I used a hobby knife to get the rough shape, and them carved out the details with a wire styrofoam cutter (not necessary, but I have the darn thing, so I’m going to use it!). Quick work, and always decent looking results. Styrofoam is great… even if you screw it up, like I did, it still comes out decent!
Base
Then I hit that with some extra cuts from a sharp hobby knife, and then smoothed it out a bit with some fine sand paper to make it look a bit weathered.

Base
Next, I drilled a hole in the base, and stuck that sucker on with some white glue. Ahhh… now I’ve got the makings of a fine base.

Assembly
I bent the tail a little more than on the box, to make it hang down the side of the ‘rock’. I think it looks a little more natural like that, and it breaks the ‘base’ plain, which is always dynamic.
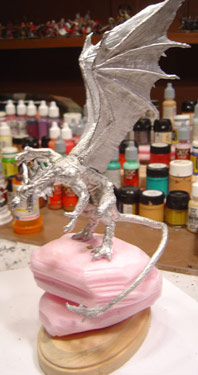
Assembly
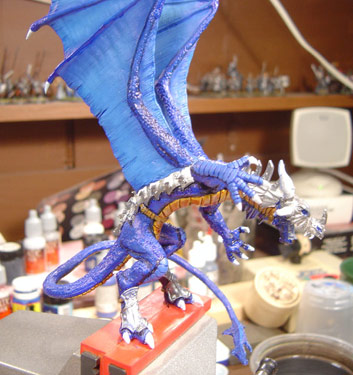
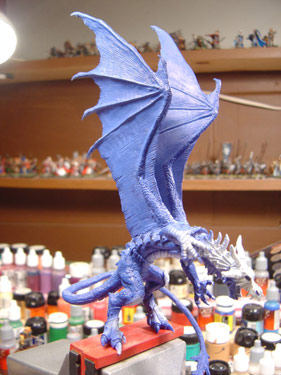
I plugged the sucker in, and stuck the wings on to test fit… the tabs on the wings did require a bit of trimming to get them to fit snuggly, but the few minutes of work waas worth it! VERY imposing, eh?

Assembly
I’ve still got some major gap filling to do on the wings, once I glue them in permanently. I’ve got 2 fat pins in each wing at the shoulder (brass rod as opposed to the standard steel straightpins that I usually use). I drilled them in as deep as I could, too. Those things aren’t going anywhere!
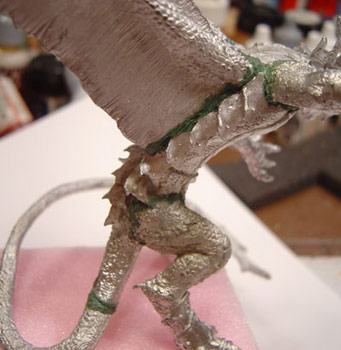
Assembly
I also finished my ‘greenstuffing’ (I’ve coined a phrase! Hoody-hoo!), so Lavarath is up for some priming before I go to bed. As usual, I’ve greenstuffed every joint, and tried to ‘sculpt’ the putty to match the surrounding areas… I’m not a sculptor, so we’ll see how it comes out, eh? It shouldn’t be too bad once the paint’s on it.
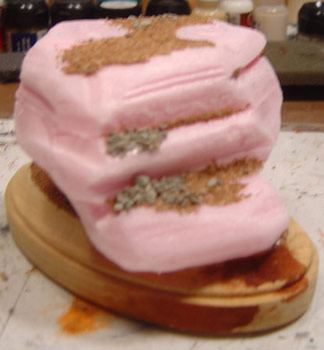
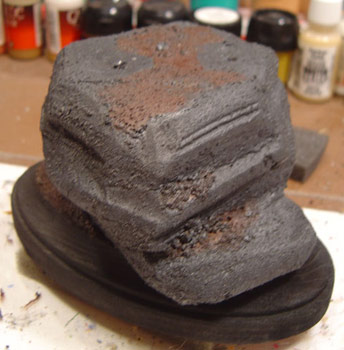
Base
The last thing that I did last night was add some texture. I basically just threw some on the top to break up that big flat area, and added some on the sides where stones might have crumbled or fallen:
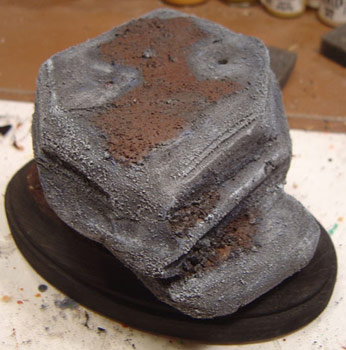
Base
When I returned I mixed up some gray textured paint using some bargain basement paint I had lying around and some sand. Textured paint’s easy, and it really helps the effect, I’ve found (one of the few tips from the GW site that I’ve used a lot!). I slathered that on the whole piece:
Base
After the first coat on the base dried, I washed the whole thing with watered down black ink and picked out the parts that I wanted to be ‘dirt’ in walnut brown (Basically, anywhere that I wanted to add flocking material/static grass to later).

Base
Then I hit it with a few layers of drybrush… My standard mix for ‘stone’, base with Reaper Pro ‘Armor Gray’, then wash with Black Ink, then drybrush with GW Shadow Grey, then VJ ‘Cold Grey’, then either GW ‘Fortress Grey’ or ‘Spacewolf Grey’…
Base

Base
Then I finally did the same to the dirt (Walnut Brown, Brown Ink, Drybrush Chestnut Brown, Snakebite Leather, Bleached Bone), picked out each individual stone on the sides, and hit it with some static grass…

Paint Jig
Okay… so last night I primed, and today I’m ready to paint. Figured I’d update first, though. Since this sucker’s pretty big, and I don’t want to take a chance on ruining that base, I’ll be using my hobby vice and an industrial size paint rig (works really well on the rods I glued into the feet!):
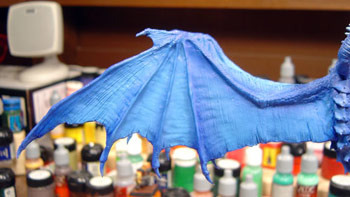
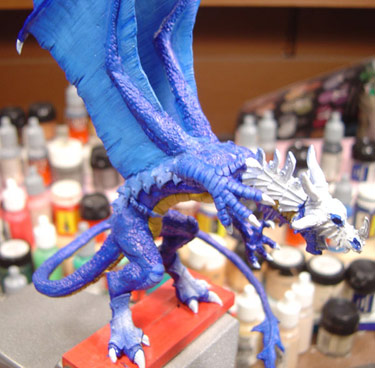
Wing
Then it was just a matter of lightening it up again, while keeping the definition:
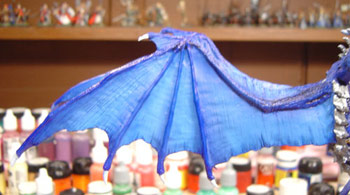
Wing

Wing
After the ink dries, it looks really nice:

Wing
After getting the blending somewhat decent, I used a technique I picked up on ‘This Old House’. I took some Blue Ink, and applied it to the webbed areas just like wood stain. I thinned it a little bit, and put it on thick… then, before it had a chance to dry, I wiped off the excess. This works really well for the large areas with little cracks and crevasses… I used the same technique on Verocithrax’s wings last year. I’d strongly reccomend experimenting with this (or any new technique) a bit before jumping into it with a mini that you don’t want to take a chance on!
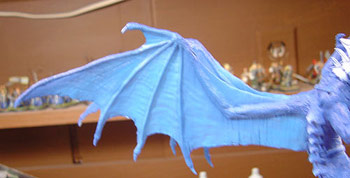
Wing
First, I lightened up the middle sections of the wing with a mix of MS “Saphire Blue” and MS “Ghost White”:
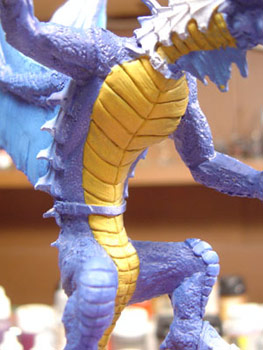
Scales
Okay… a bit of progress, although it might not look like much. First off, I got the belly and underside done:
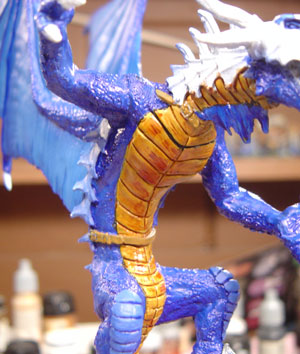
Scales
The first thing that I did today was wash the belly scales with a brown ink. I wanted something that would soak into the cracks a little bit and darken the scales a touch… I plan on highlighting up from here and using RMS Amber Gold as my final highlight..
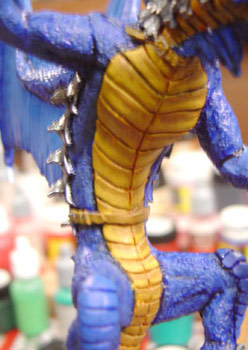
Scales
Got one major milestone done tonight. I’m either finished, or close to finished with the belly scales. I went over the washed scales with Leather Brown on top, and Game Color Plague Brown on the bottom half…

Scales
Then, I layered it up by adding a darker brown to the mix, and worked that towards the top of the scales, and by adding RMC Amber Gold to the Plague Brown and working towards straight Amber Gold on the bottom…

Belly Scales
On to todays progress… on the note of the belly scales, I give you the definition of ‘monotony’. Lot’s of scales on that tail. Four colors on each scale, plus the ink outline, that’s 7 brush strokes per scale, that’s … too many to count.

Wash
Wash

Wash
Wash
Paint
Second, I got my first wash done. I washed ALL of the blue (excluding the wings) in a diluted dark blue ink. This’ll give me a little more definition to the scales before I start my next step, which’ll be shading. But since there’s a LOT of broad areas to deal with, there won’t be too much of that… hence, the wash.
Paint
I did the basecoat with an airbrush, just so I wouldn’t have to spend so much time with such small brushes. I thinned the paint a lot with windex (thanks for the tip, Jester!) so that it’d flow better. Worked fine!

Head
After the wash, I started to paint in wide bands, from the bottom up (leaving a little of the blue wash showing through in slits)… first with white, then with VGC ‘Wolf Grey’ over the top of it…

Head

Head
Head
After the wash, I started to paint in wide bands, from the bottom up (leaving a little of the blue wash showing through in slits)… first with white, then with VGC ‘Wolf Grey’ over the top of it…
Head
I don’t think they came out nearly as badly as I was afraid they would. In fact, I kinda like ’em. There’s a lesson, kids, don’t be afraid to try something new when you paint… You just might like the results!
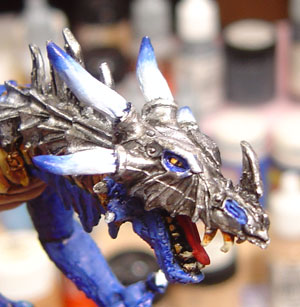
Head
I blended up with RMS ‘Snow Shadow’ until I got to Ultramarine Blue at the tips… I went back and blended it all together as smoothly as I could, and picked out the very tips in GW ‘Regal Blue’… After that is was just a little touch-up with the white along the bottoms…
Hand
First, I picked out the scales on the back of the hands and knees in Ultramarine Blue… I had previously already washed around them and in the cracks when I did my dark wash on the whole figure:
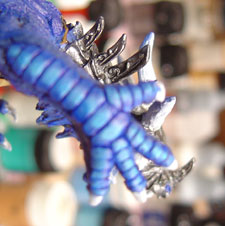
Hand
Then, I started layering lighter color towards the middle (using a similar technigue as I did for the belly scales). I first added some White to the Ultramarines Blue, but I wanted to end up somewhere around RMS ‘Sky Blue’ as my lightest highlight…
Hand
I let the layers get tighter and tighter, kinda like you would on a gem, until I was left with just a pinpoint of sky blue at the center of the scale… I ran through the gaps with blue ink again, and I think I’m done with these scales…

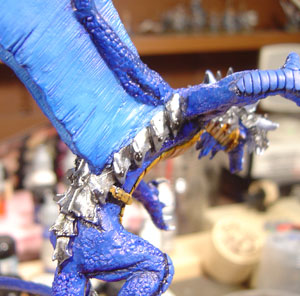
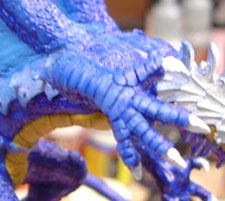
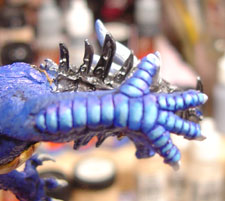
Foot
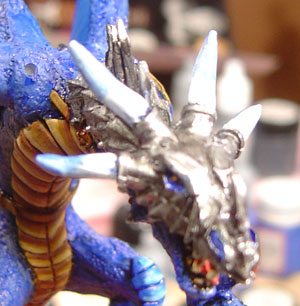
Next, I hit the metallic sections with a base coat. I was going to save them for last, but I got impatient. I used a dark metallic on all the metallics on the figure. (Game Color “Gun Metal”).
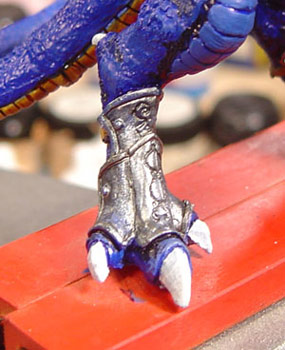
Foot
Final step this evening, I washed the metal in watered down black ink.
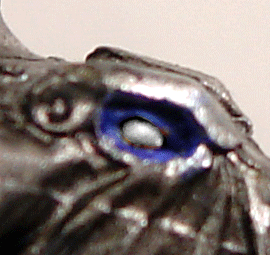
Eye
Also, I finished up the eyes, and the horns. As for the eyes, all the pictures that I took came out horribly, so I put together this little animation of the steps I did… basically, painted the eye white, then yellow, then added the slitted pupil, then added in some reflections… hope this sums it up (animated gif):
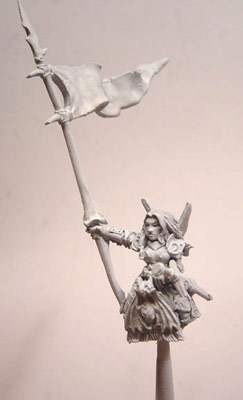
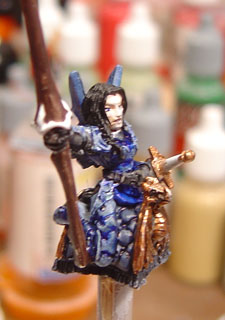
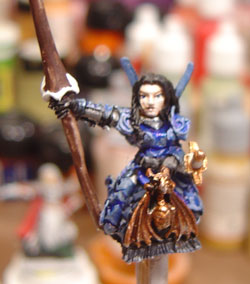
Rider
As for the rider, she’s pinned, she’s primed, and she’s waiting for paint. I used a single straightpin in her arm to support the hand. I drilled into the arm to about the elbow with a pin vise, and went almost all the way through the hand on the other piece. Quick tip: shave off the little nubby thing on her wrist before you start. It’ll give your glue/epoxy a little more surface area to ‘grab’ onto, and it’ll make the drilling quite a bit easier.
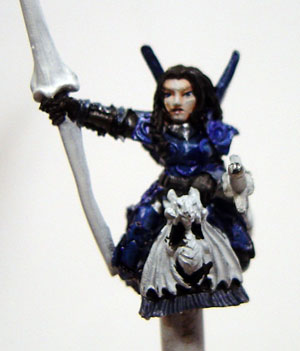
Rider
Okay… due to some computer issues, the updates not as much as I thought it would be… got the rider base coated, and washed… I’m about 1/2 way home with her.
Rider
Rider
Rider
I did manage to get some more done on the rider. Since the base coat is done, I worked on my first layer of higlights. I’m trying the whole non-metal highlights over metallic for the armor (it can really make the edges ‘pop’ some times). A lot of people don’t like the look, but I think it’s neat (and that’s all that matters).
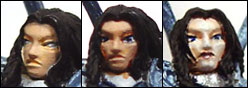
Face
I basecoated with the medium tonethen used a light brown wash to outline the face and the eyes. I worked the ‘Fair Shadow’ in towards the edges, and into the recesses of the cheeks (as well as the chin… I figured a powerful woman should have a cleft chin, eh?). Then it was just a matter of doing the eyes, and highlighting up to the ‘fair shadow’ again…
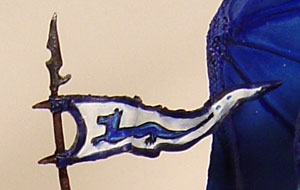
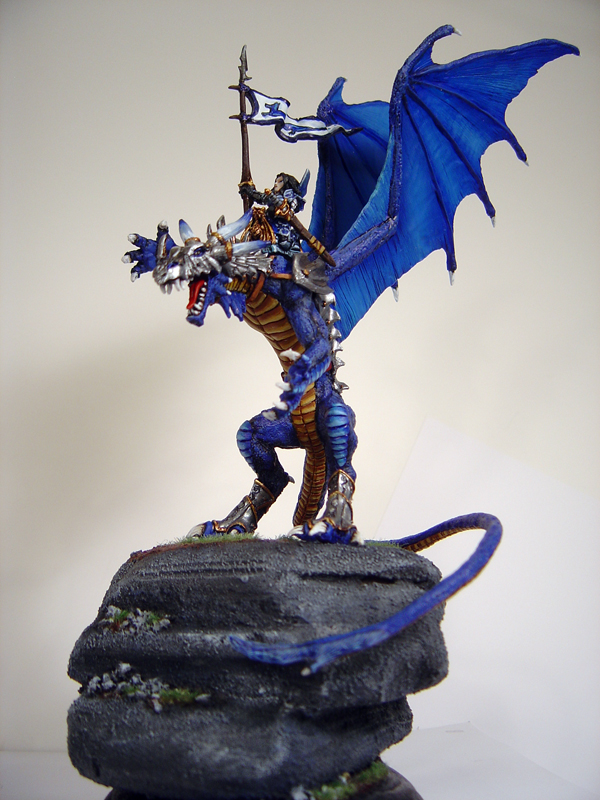
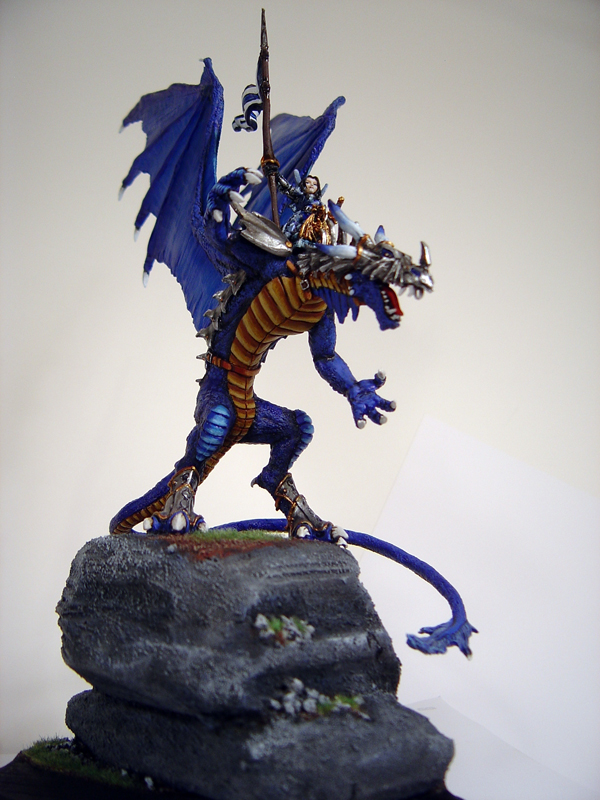
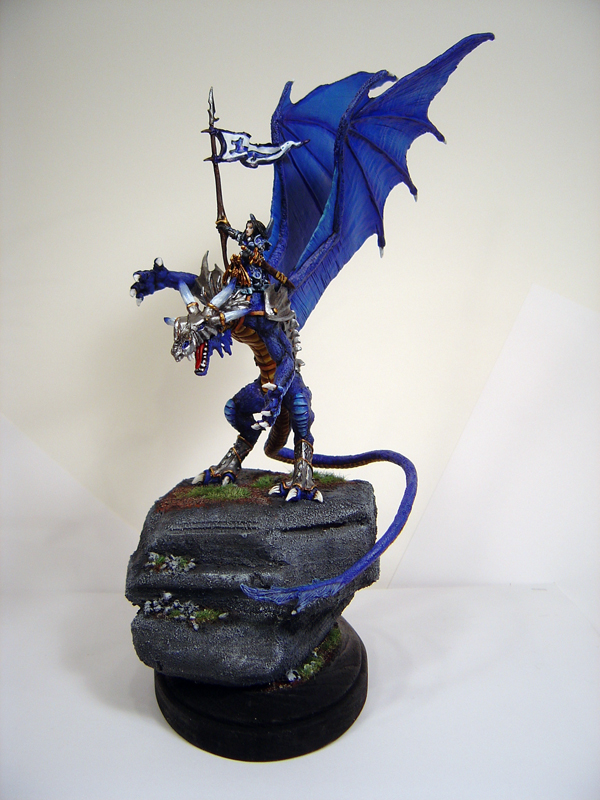
Banner
Mounted
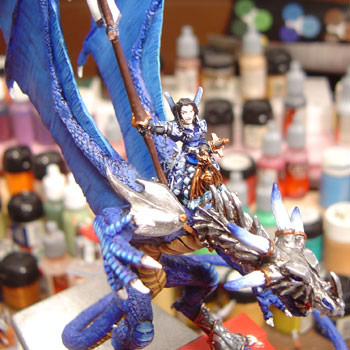
Mounted
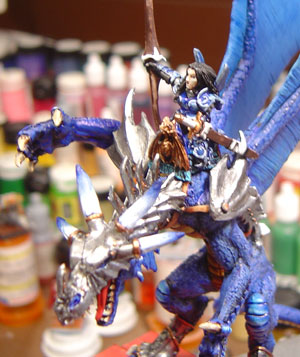
Mounted
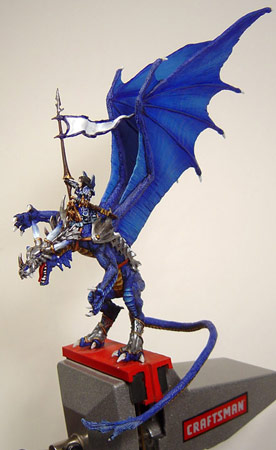
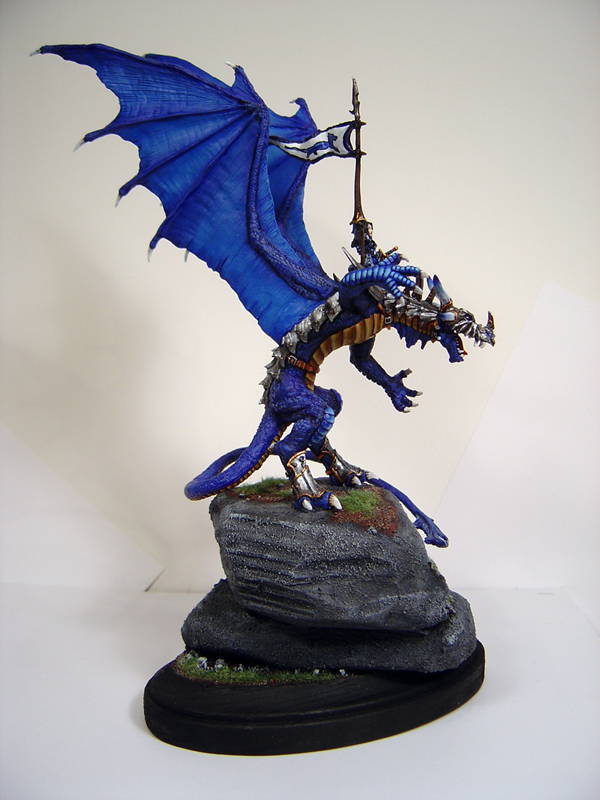
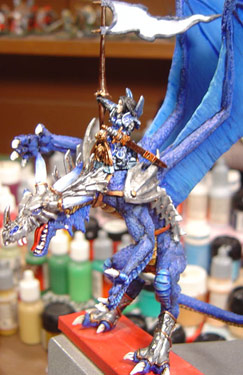
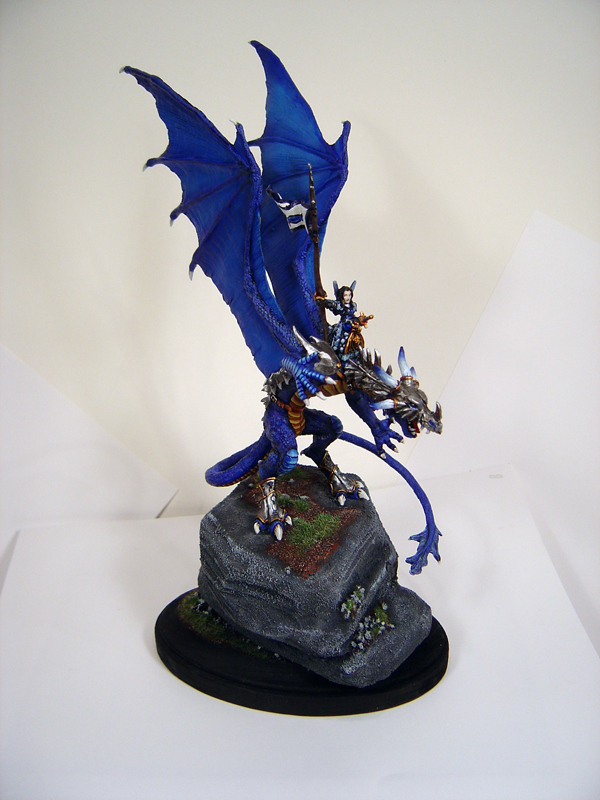
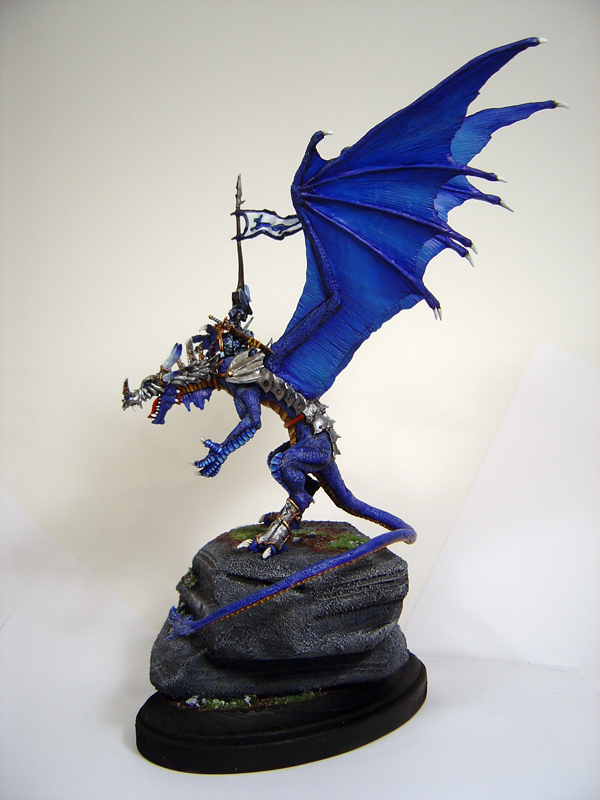
Painted
I’m gonna consider this sucker DONE. Glue ’em to the base, and we’re set. This was a fun project for me.
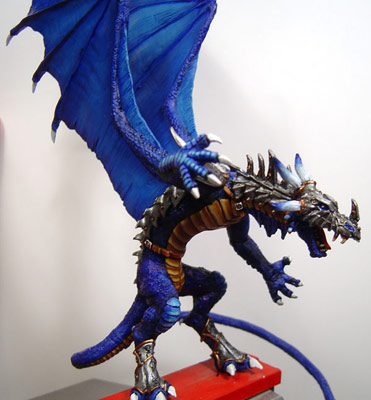
Painted
I’m down to details… General scalework on the blue portions, then just cleaning up the metal, and finishing his teeth and talons. That’s really it. Oh… and the rider, which I started on today, but haven’t made significant progress with (so no pics!).
Finished
Finished

Finished
Finished
Finished

Finished
Finished